
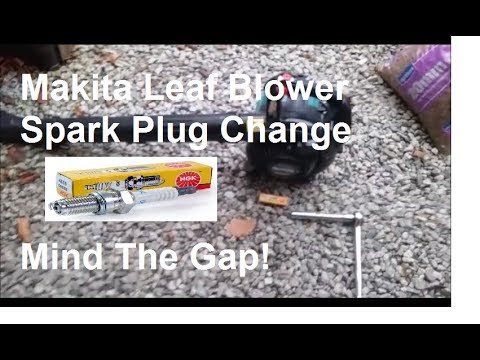
Changing a leaf blower spark plug is a simple repair for many gas-powered blowers sold in the United States. Let the engine cool, remove the spark plug boot, take out the old plug, check the new plug’s type and gap, then install it to the torque listed in the owner’s manual.
Use the exact spark plug specified for your leaf blower. Plug size, heat range, thread length, and gap vary by model. A plug that looks similar may still damage the engine or cause poor starting.
This guide covers handheld and backpack gas leaf blowers used in American homes and yards. It does not apply to battery-powered or corded electric blowers, which do not use spark plugs.

What You Need Before You Start
Gather the correct plug and a few basic tools before you begin. Most leaf blower owners can complete the job in less than 30 minutes.
Tools and supplies
You may need:
- The correct replacement spark plug
- Spark plug socket
- Ratchet or socket handle
- Short extension, if needed
- Gap gauge or wire-style spark plug gauge
- Clean cloth
- Small brush
- Work gloves
- Safety glasses
- Torque wrench, if available
- Compressed air, used with care
Many leaf blowers use a small 5/8-inch or 3/4-inch spark plug socket, but socket size is not universal. Check the owner’s manual before buying a tool.
Find the correct spark plug
Look for the plug specification in one of these places:
- The leaf blower owner’s manual
- The engine or emissions label
- The manufacturer’s maintenance chart
- The original spark plug
- The manufacturer’s official parts catalog
Do not rely only on the brand name. A single brand may use different plugs across several engine families.
Check these details:
| Specification | Why it matters |
|---|---|
| Thread diameter | Must match the cylinder head |
| Thread length, or reach | A plug that is too long can contact internal engine parts |
| Heat range | Affects plug temperature during operation |
| Terminal style | Must fit the spark plug boot |
| Electrode gap | Affects ignition and starting |
| Resistor type | May be required by the ignition system |
Some manufacturers list a plug gap in inches. Others list millimeters. For example, 0.020 inch is about 0.5 millimeter. Use the exact value in your manual rather than a general online chart.
Safety checks
Work outdoors or in a well-ventilated area. Keep the blower away from gasoline, fuel vapors, cigarettes, heaters, and open flames.
Before touching the spark plug:
- Turn the engine off.
- Let the engine and muffler cool fully.
- Place the blower on a stable surface.
- Move the ignition switch to the off position.
- Disconnect the spark plug boot.
- Keep the throttle away from the start position.
- Wear eye protection when cleaning around the plug.
Do not start or test the engine while the spark plug is removed. Fuel vapor can ignite if the ignition system produces a spark.

How to Change a Leaf Blower Spark Plug
Follow these steps in order. The key points are to keep dirt out of the cylinder and avoid damaging the plug threads.
1. Cool and clean the blower
set the leaf blower on a level surface and allow it to cool. The muffler can stay hot long after the engine stops.
Brush or wipe dirt from the area around the spark plug. If you use compressed air, wear eye protection and direct the air away from your face. Dirt around the plug can fall into the cylinder after you remove it.
Do not wash the engine with a hose. Water and debris can enter the air filter, carburetor, ignition parts, or exhaust system.
2. Remove the spark plug boot
Find the rubber boot attached to the top of the spark plug. Grip the boot itself and pull it straight up with a gentle twisting motion.
Do not pull on the ignition wire. The wire connects to the ignition coil, and pulling it can loosen or damage the connection.
If the boot is stuck, work it loose with a small twisting motion. Do not pry against the ceramic insulator with a screwdriver.
3. Inspect the old plug
Look at the old plug before removing it. Its condition may provide useful information about the engine.
Common observations include:
- Light tan or gray deposits: Often consistent with normal combustion.
- Dry black soot: May point to a rich fuel mixture, a dirty air filter, repeated cold operation, or an ignition problem.
- Wet fuel: May indicate flooding, a failed ignition spark, or starting trouble.
- Oily deposits: May indicate oil entering the combustion chamber.
- White deposits or a blistered electrode: May indicate excess heat or an incorrect plug.
- Cracked ceramic: Can allow the spark to escape and cause misfiring.
A plug’s appearance can suggest a problem, but it does not prove the cause. Other parts, such as the carburetor, air filter, ignition coil, or fuel system, may need testing.
4. Remove the old spark plug
Fit the correct spark plug socket over the plug. Turn the ratchet counterclockwise to loosen it.
Keep the socket straight. A tilted socket can crack the ceramic insulator or damage the plug hex.
If the plug will not move, do not use extreme force. A damaged aluminum cylinder head can be expensive to repair. Apply steady pressure with the correct socket, and stop if the threads feel seized or the plug begins to break.
After loosening the plug, remove it by hand. This helps prevent cross-threading and lets you feel whether the threads are binding.
5. Compare the replacement plug
Place the new plug beside the old one. Compare:
- Thread diameter
- Thread length
- Insulator shape
- Terminal connection
- Electrode design
- Manufacturer part number
Do not install the replacement if the dimensions differ from the specification in the manual. A plug can fit the socket but still be wrong for the engine.
6. Check and adjust the electrode gap
The gap is the small space between the center electrode and the ground electrode. The ignition system creates a spark across this space.
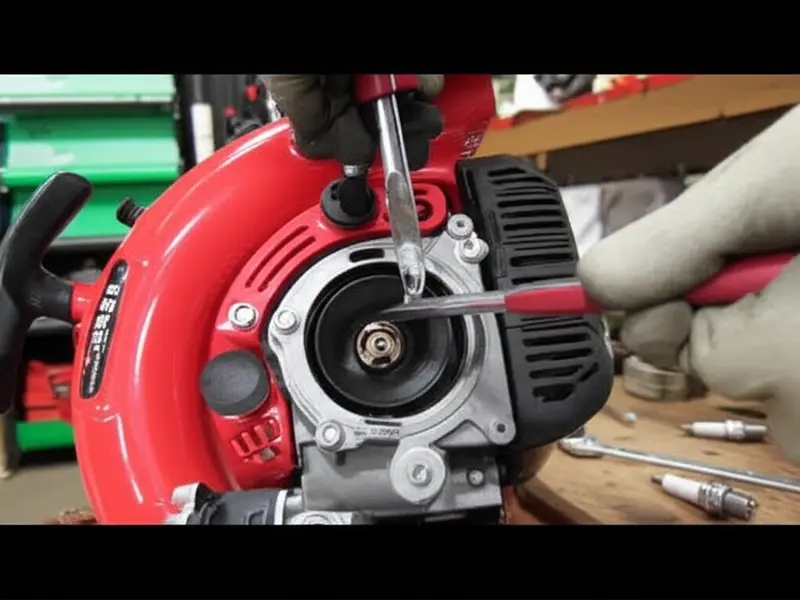
Use a gap gauge to check the measurement. If the gap is incorrect, adjust it carefully by bending the ground electrode. Do not press on the center electrode or porcelain insulator.
Use only light pressure. A damaged electrode or cracked insulator can cause misfiring.
Never assume a new plug is set correctly. Factory gaps can change during shipping or handling. Always confirm the gap against the leaf blower manual.
7. Install the new spark plug by hand
Place the new plug into the spark plug socket. Start turning it clockwise by hand or with a short extension, without using the ratchet.
The plug should turn smoothly for several full turns. If it binds at once, remove it and start again. Cross-threading the plug can damage the cylinder head.
Keep the plug clean. Do not drop it, strike it, or force it into the threaded hole.
8. Tighten the plug correctly
Tighten the spark plug to the torque listed in the owner’s manual. A torque wrench gives the most reliable result.
Overtightening can:
- Strip the cylinder-head threads
- Crush the sealing washer
- Crack the ceramic insulator
- Make future removal difficult
Under-tightening can allow combustion gases to escape. It may also cause the plug to loosen during operation.
If the manual gives a procedure for a new plug with a crush washer, follow that procedure. Do not guess based on a different engine. Spark plug torque depends on the plug type, thread size, cylinder-head material, and sealing design.
Avoid anti-seize unless the manufacturer specifically permits it. Anti-seize changes the friction between the threads and can lead to excessive clamping force when a listed dry torque is used.
9. Reconnect the spark plug boot
Push the boot firmly onto the new spark plug. It should seat over the terminal and remain secure.
Do not twist or sharply bend the ignition wire. Make sure the wire does not touch the hot muffler or rub against a moving part.
10. Test the leaf blower
Move the blower to a clear outdoor area. Check that the tube is installed and that no tools remain near the engine.
Start the blower according to the manual. A successful repair usually produces:
- A normal start
- A steady idle
- Smooth acceleration
- No repeated misfire
- No unusual popping from the muffler
- No spark plug boot movement
Let the engine run briefly. Stop it if you smell raw fuel, hear severe knocking, see smoke from an unexpected area, or notice a loose plug.

What to Do If the Leaf Blower Still Will Not Start
A new spark plug does not fix every starting problem. Check the most likely and safest causes first.
| Symptom | Possible cause | Next check |
|---|---|---|
| Engine does not turn over | Stop switch, starter, or mechanical fault | Confirm the switch and starter system |
| Engine turns but does not start | No fuel, flooding, or no ignition spark | Check fuel condition and ignition |
| Engine starts and stops | Fuel restriction, dirty carburetor, or blocked vent | Inspect fuel flow and air filter |
| Engine runs rough | Wrong gap, damaged plug, air leak, or fuel issue | Recheck plug and inspect intake parts |
| Engine loses power | Dirty air filter, blocked exhaust screen, or fuel problem | Service the filter and inspect the muffler |
| Plug becomes wet | Flooding or weak ignition | Let the engine clear and test the ignition system |
| Plug becomes black quickly | Rich mixture, dirty filter, or weak spark | Inspect the filter, carburetor, and ignition |
| Plug loosens | Incorrect tightening or damaged threads | Stop using the blower and inspect the threads |
Check the simple causes first
Confirm that:
- The spark plug boot is fully seated.
- The plug has the correct gap.
- The stop switch is in the run position.
- The fuel tank contains fresh fuel mixed at the correct ratio, if required.
- The air filter is not blocked.
- The choke is being used as the manual directs.
- The fuel cap vent and fuel lines are not blocked.
Gasoline can degrade during storage. Use the fuel type and oil-to-gas ratio specified for the engine. Never add straight gasoline to an engine that requires a premixed two-stroke fuel blend.
When to stop troubleshooting
Stop and seek qualified small-engine service if:
- The plug threads are stripped.
- The plug is seized in the cylinder head.
- The starter rope locks or feels unusually hard to pull.
- The engine has no spark after a correct plug replacement.
- Fuel leaks from the tank, line, carburetor, or primer.
- The engine backfires repeatedly.
- You suspect internal engine damage.
Do not defeat a safety switch or continue running an engine with a fuel leak.
Spark Plug Maintenance and Replacement Tips
Replace the plug at the interval listed by the manufacturer. There is no single replacement schedule for every leaf blower. Some manuals set a time interval, while others direct the owner to inspect the plug during routine service and replace it when worn or damaged.
A plug may need replacement sooner when the blower:
- Runs with an incorrect fuel mixture
- Operates with a dirty air filter
- Is stored with old fuel
- Runs for long periods at high load
- Has a carburetor or ignition fault
- Experiences repeated flooding
Keep a spare plug with the blower if the equipment is used far from home. Store it in its original package so the electrode and ceramic remain protected.
Do not clean a worn or damaged plug as a permanent repair. Cleaning may remove deposits, but it does not restore a rounded electrode, worn gap, cracked insulator, or damaged sealing washer.
Use a new plug when the old one has:
- A cracked insulator
- A bent or badly worn electrode
- Damaged threads
- Heavy deposits that return quickly
- Evidence of overheating
- A damaged terminal
A replacement plug is only one part of a complete maintenance plan. Also follow the manual for air-filter cleaning, fuel storage, cooling-fin cleaning, muffler-screen inspection, and seasonal storage.

Common Mistakes to Avoid
Installing the wrong plug
A plug from another small engine may fit the socket but not the leaf blower. Match the full part specification, not just the brand.
Skipping the gap check
A plug with a gap that is too wide may be hard to fire. A gap that is too narrow can weaken combustion performance. Confirm the measurement before installation.
Pulling the ignition wire
Pulling the wire instead of the boot can damage the connection. Always grip the rubber boot.
Forcing the plug into the head
If the plug does not turn easily by hand, stop. Remove it and realign it. A cross-threaded plug can damage the cylinder head.
Using a ratchet to start the plug
Start the plug by hand. Use the ratchet only after the threads engage smoothly.
Overtightening
More force does not create a better seal. Use the manufacturer’s torque value or installation method.
Using anti-seize without checking the manual
Anti-seize can alter the tightening force. Use it only when the manufacturer allows it and provides suitable guidance.
Testing with the plug against the engine
Holding the plug against the engine to check for spark can create an ignition hazard. Fuel vapor may be present. Use the manufacturer’s approved test method or have a technician check the ignition system.

Frequently Asked Questions
How often should I change a leaf blower spark plug?
Follow the service interval in your owner’s manual. If no interval is provided, inspect the plug during regular maintenance and replace it when the electrode is worn, the ceramic is cracked, the gap will not hold, or deposits return quickly.
What size spark plug does a leaf blower use?
There is no universal size. Leaf blowers may use different thread sizes, reaches, heat ranges, and gaps. Check the exact engine model and manufacturer parts information.
Should I put oil or anti-seize on a spark plug?
Usually, install the plug clean and dry unless the manufacturer gives different instructions. Oil can affect tightening and may contaminate the plug. Anti-seize can change thread friction and lead to over-tightening.
Why does my leaf blower start after changing the plug but then stop?
Possible causes include old fuel, flooding, a clogged air filter, restricted fuel flow, a blocked fuel-cap vent, or a carburetor problem. Recheck the plug boot and gap first, then follow the starting and fuel checks in the manual.
Can I use a car spark plug in a leaf blower?
Do not do so unless the manufacturer lists that exact plug for the blower. Automotive and small-engine plugs can differ in thread reach, heat range, electrode design, and terminal style.
Should I replace the spark plug boot too?
Replace the boot if it is cracked, loose, burned, or unable to stay attached. A damaged boot can cause an intermittent spark even when the new plug is correct.
Final Checklist
Before returning the leaf blower to regular use, confirm that:
- The replacement plug matches the manufacturer’s specification.
- The electrode gap is correct.
- The plug started by hand without binding.
- The plug is tightened to the manual’s specification.
- The boot is fully seated.
- No fuel is leaking.
- The engine starts, idles, and accelerates normally.
- The blower has no unusual smoke, noise, or repeated misfire.
If the blower still fails after these checks, the fault may be in the fuel, air, ignition, or compression system. At that point, a qualified small-engine technician can test the system without risking damage to the cylinder head or ignition parts.