
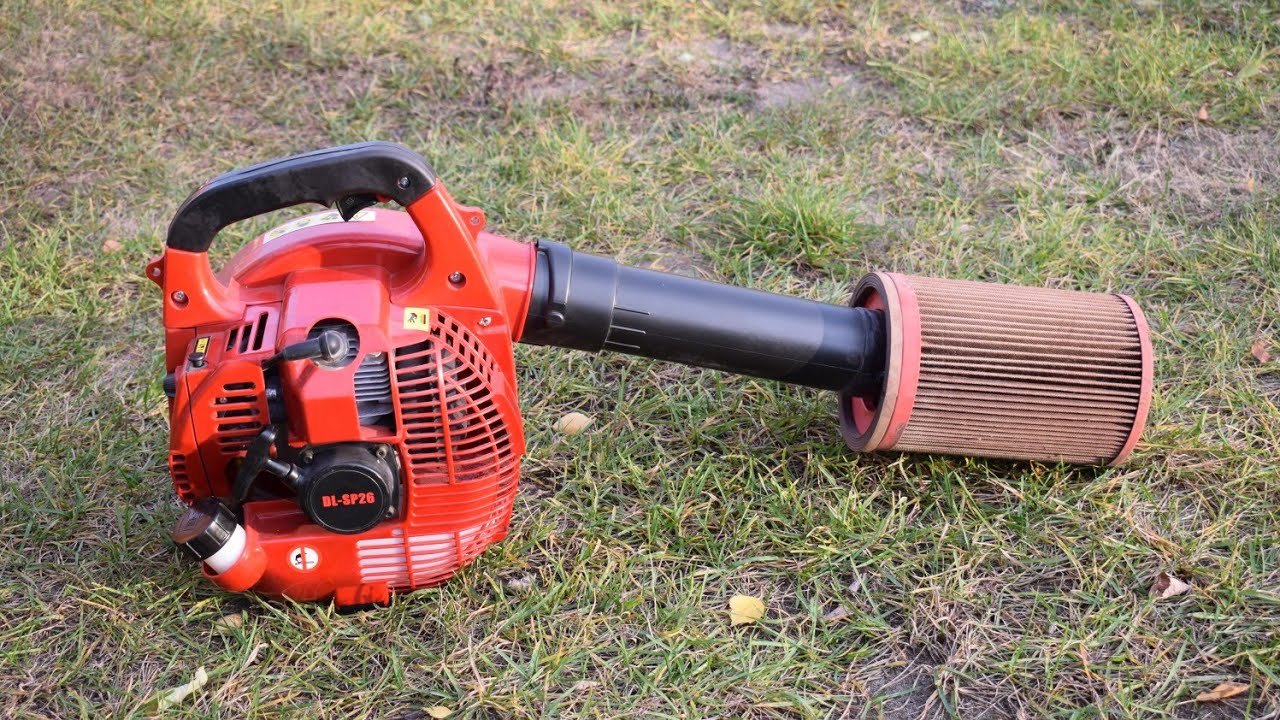
To clean a leaf blower air filter, turn off and cool the machine, remove the filter, clean it according to its type, let it dry fully, and reinstall it correctly. Foam filters may usually be washed and lightly oiled. Paper or pleated filters should usually be tapped clean or replaced, not washed.
This guide applies to leaf blowers used in the United States, including gas, corded electric, and cordless models. Always check the owner’s manual first because filter materials, removal steps, and replacement rules vary by brand and model.

Why a Clean Leaf Blower Air Filter Matters
A clean air filter lets the engine or motor receive the air it needs. A dirty filter can reduce airflow, lower performance, increase fuel use on gas models, and make the blower harder to start.
The filter also blocks dust, grass, and fine debris from reaching sensitive parts. If you run a gas leaf blower without its filter, dirt can enter the engine and cause wear.
A filter needs cleaning or replacement when you notice:
- Weak air output
- Hard starting
- An engine that stalls or surges
- Excess smoke from a gas blower
- A filter that looks dark, oily, clogged, torn, or crushed
- Dust or debris inside the filter housing
A small amount of surface dust may not require a full wash. Heavy dirt, oil, moisture, or visible damage needs more attention.

Identify Your Leaf Blower Air Filter Type
The cleaning method depends on the filter material. Most leaf blowers use one of these three types.
| Filter type | Common appearance | Usual cleaning method | When to replace |
|---|---|---|---|
| Foam | Soft, black, white, or yellow foam | Wash, dry, and lightly oil if the manual requires it | When torn, brittle, misshapen, or unable to hold oil |
| Paper or pleated | Folded paper inside a plastic frame | Tap gently or use a soft brush if allowed | When dirty, wet, damaged, or clogged |
| Fabric or mesh | Thin synthetic screen or mesh | Brush or rinse only if the manual permits | When torn, stretched, or permanently blocked |
Some models use a foam pre-filter over a paper filter. Clean each part separately and follow the instructions for both.
Do not assume that two filters made by the same brand use the same method. The exact model manual is the best source for filter care, oil type, and replacement limits.

What You Need Before Cleaning
Gather the following items before you begin:
- The leaf blower owner’s manual
- Clean water
- Mild dish soap
- A clean, lint-free cloth
- A soft brush or old toothbrush
- A small container
- The correct replacement filter, if needed
- Foam filter oil, if the manual calls for it
Do not use gasoline, brake cleaner, paint thinner, or other harsh solvents on a foam filter. These products can damage foam and create a fire hazard.
For a gas leaf blower, work outdoors or in a well-ventilated area. Keep the machine away from cigarettes, flames, sparks, and hot surfaces. For an electric blower, unplug it. For a cordless blower, remove the battery.

How to Clean a Foam Leaf Blower Air filter
foam filters are common on small gas engines. They can often be cleaned several times before replacement.
1. Shut down and secure the blower
Turn off the leaf blower and let the engine cool completely. Remove the spark plug wire on a gas model if the manual allows and if you need extra protection from accidental starting.
Unplug corded models. Remove the battery from cordless models. Place the blower on a stable, dry surface.
2. Remove the filter cover
Find the air filter cover near the engine or motor intake. It may be held by screws, clips, or a knob.
Remove the cover carefully. Keep screws and clips in a small container so they do not get lost. Note how the filter sits before taking it out.
3. Remove loose dirt
Gently shake or tap the filter over a trash can. Do not twist, stretch, or squeeze it while it is dry.
Brush loose dirt from the filter housing. Keep debris from falling into the air intake. A clean cloth can remove dust around the cover and seal.
4. Wash the foam filter
Add warm water and a small amount of mild dish soap to a container. Place the foam filter in the soapy water and gently squeeze it several times.
Do not wring or twist the foam. Twisting can tear or deform it. Rinse the filter with clean water until no soap remains.
5. Dry the filter completely
Press the filter between clean towels to remove extra water. Then allow it to air-dry fully.
Do not reinstall a damp filter. Moisture can restrict airflow and may cause problems inside the intake system. Do not use a heat gun, open flame, or high heat to speed up drying.
6. Apply oil only when required
Many foam filters need a small amount of clean filter oil after washing. Check the manual before applying it.
Place a small amount of the specified oil on the dry filter. Work the oil through the foam by gently squeezing it. The filter should be evenly coated, not dripping wet.
Too much oil can restrict airflow or enter the engine. Do not use motor oil unless the manual specifically permits it.
7. Reinstall the filter
Place the filter in its original position. Make sure it sits flat and seals around the intake opening.
Reinstall the cover and tighten screws or clips evenly. Do not run the blower with the cover loose or the filter missing.

How to Clean a Paper or Pleated Air Filter
Paper filters are more fragile than foam filters. Water can damage the paper fibers and cause the filter to collapse or lose its filtering ability.
Use this method only if the owner’s manual permits cleaning. Many manufacturers recommend replacing a dirty paper filter instead.
- Turn off and cool the blower.
- Disconnect the power source.
- Remove the filter cover.
- Lift out the filter without dropping dirt into the intake.
- Tap the filter gently against your hand or a clean, hard surface.
- Brush away loose dust from the outside.
- Inspect the pleats, frame, and sealing edge.
- Replace the filter if it remains clogged or shows damage.
- Reinstall the filter with the correct side facing the intake.
Do not wash a paper filter unless the manufacturer specifically says it is washable. Do not blast it with compressed air. High-pressure air can tear the paper or force dust deeper into the filter.
Replace a paper filter if it is wet, oily, crushed, torn, heavily stained, or difficult to see through when held up to a light. A replacement filter is usually safer than trying to restore a damaged one.

How to Clean a Fabric, Mesh, or Pre-Filter
Some leaf blowers use a fabric screen or a foam pre-filter over a main filter. The cleaning method depends on the material.
For a dry fabric or mesh filter:
- Remove loose dust with a soft brush.
- Wipe the frame and sealing area.
- Rinse it only if the manual allows water.
- Let it dry fully before reinstalling it.
If the pre-filter is washable, use mild soap and clean water. Avoid harsh chemicals and rough scrubbing.
If the blower has both a pre-filter and a paper filter, do not treat them as one part. Clean the washable pre-filter as directed and replace the paper element when it is clogged or damaged.

How Often Should You Clean a Leaf Blower Air Filter?
Check the filter before each use if you work in dusty conditions. Otherwise, inspect it at the service interval listed in the owner’s manual.
A practical inspection schedule is:
| Use condition | Recommended action |
|---|---|
| Light use on paved areas | Inspect every few uses |
| Regular yard work | Inspect regularly and clean when visibly dirty |
| Dry, dusty, or sandy areas | Check before each use |
| Mulch, leaves, or fine debris | Check during and after heavy jobs |
| Storage after the season | Clean and inspect before storage |
The correct interval depends on the amount of dust, the filter design, and the blower’s workload. Cleaning too late can reduce performance. Cleaning too aggressively can damage the filter.
Never clean a filter simply by habit if the manual says to replace it. Paper filters often have a limited service life even when they look acceptable.

Signs You Cleaned or Installed the Filter Correctly
After cleaning, the filter should be dry, secure, and free of major dirt. The sealing edge should sit evenly against the housing.
A gas blower should start and run without unusual surging, excessive smoke, or sudden loss of power. A cordless or corded blower should deliver steady airflow without an obstructed intake.
Stop and check the installation if:
- The blower will not start after filter service
- The engine runs only with the choke partly closed
- Airflow is weaker than before
- The filter cover will not close
- The engine smokes heavily after oiling a foam filter
- Dust appears inside the air intake
A filter may not be the only cause of poor performance. Fuel quality, a blocked spark arrestor, a dirty carburetor, a damaged impeller, a weak battery, or an electrical fault can create similar symptoms.

What to Do If Cleaning Does Not Fix the Problem
Use a safe, simple check sequence.
If a gas blower will not start
Confirm that:
- The filter is installed correctly.
- The filter is completely dry.
- The spark plug wire is connected.
- The fuel is fresh and suitable for the model.
- The choke and primer are used as the manual describes.
- The stop switch is in the run position.
Do not keep pulling the starter if fuel is leaking or the engine smells heavily of gasoline. Move the blower outdoors and allow spilled fuel to evaporate before further work.
If the blower still has weak airflow
Check the intake screen, tube, nozzle, and impeller area for leaves or packed debris. Disconnect the battery, unplug the cord, or remove the spark plug wire before clearing a blockage.
Never place your fingers near a moving impeller. If the impeller is damaged or the motor makes a grinding sound, stop using the blower.
If the blower smokes after cleaning
Too much oil on a foam filter may be entering the intake. Stop the engine, let it cool, and inspect the filter. Remove excess oil only by following the filter instructions.
Persistent smoke can indicate an engine problem. Seek qualified repair service if smoke continues or the blower leaks fuel or oil.

Common Mistakes to Avoid
Washing a paper filter
Water can weaken paper filter media. Replace it unless the manual clearly permits washing.
Using compressed air at high pressure
Compressed air can damage pleats and push dirt through the filter. Use gentle tapping or a soft brush instead.
Installing a wet foam filter
A wet filter can restrict airflow. Dry it completely before installation.
Over-oiling a foam filter
A foam filter should be lightly and evenly coated when oil is required. Excess oil can reduce airflow and cause smoke.
Running without a filter
The blower may appear to run normally, but unfiltered dust can enter the engine. Always use the correct filter and cover.
Cleaning around the intake carelessly
Loose dirt can fall into the intake while the filter is removed. Wipe the housing before removing the filter when possible, and keep the opening covered from debris.
Using the wrong replacement filter
A filter that looks similar may not seal correctly. Use the part number listed in the manual or verify compatibility with the blower model.

Key Takeaways
- Turn off, cool, and disconnect the leaf blower before removing the filter.
- Identify whether the filter is foam, paper, fabric, or a combination.
- Wash foam only when the manual permits it.
- Do not wash or blast most paper filters.
- Dry washable filters fully before reinstalling them.
- Use filter oil on foam only when required.
- Replace filters that are torn, crushed, wet, brittle, or still clogged.
- If performance remains poor, check for other causes or arrange professional service.
Frequently Asked Questions
Can I wash a leaf blower air filter?
You can usually wash a foam filter with mild soap and water if the owner’s manual permits it. Do not wash a paper or pleated filter unless the manufacturer specifically says it is washable.
Should I oil a foam leaf blower filter?
Some foam filters require a light coating of filter oil. Others do not. Check the manual, and never saturate the filter.
Can I use compressed air to clean a leaf blower filter?
Use compressed air only if the manufacturer allows it and at the specified pressure. For most paper filters, gentle tapping or replacement is safer than high-pressure air.
How do I know when to replace the air filter?
Replace it when it is torn, brittle, crushed, wet, oily, permanently clogged, or unable to seal. Replace a paper filter when cleaning no longer restores airflow.
Why does my leaf blower run poorly after I clean the filter?
The filter may be wet, over-oiled, installed backward, or not sealed correctly. If the filter is correct, inspect the fuel, spark plug, intake, spark arrestor, battery, tube, and impeller for other faults.
Conclusion
Cleaning a leaf blower air filter is simple when you match the method to the filter material. Foam filters can often be washed, dried, and lightly oiled, while paper filters usually need gentle dust removal or replacement.
Use the owner’s manual as the final authority for your model. A clean, dry, correctly installed filter protects the blower and helps it deliver steady performance.