
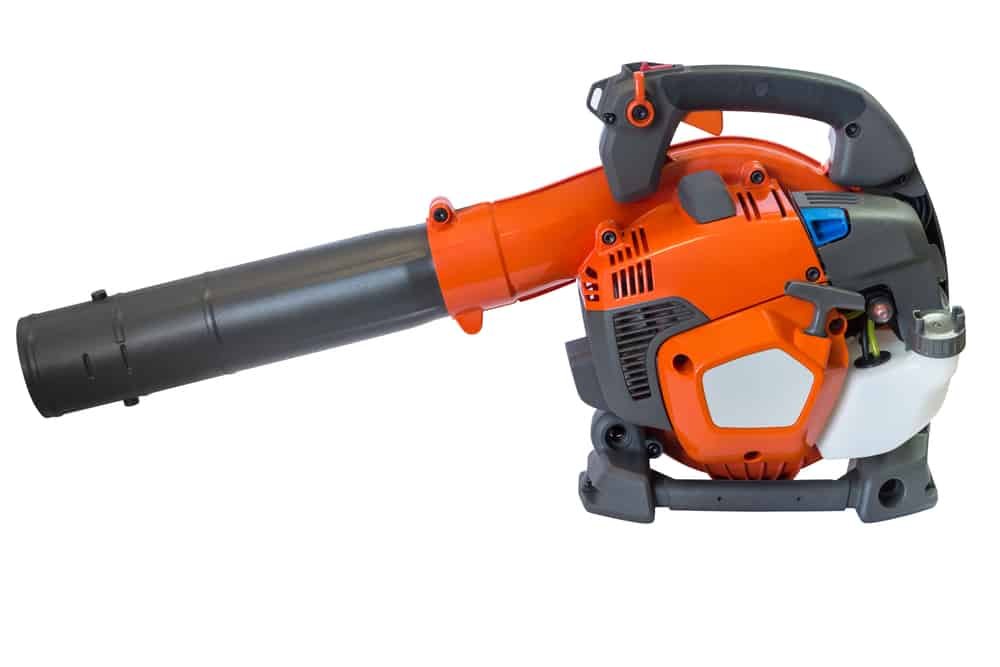
Changing the oil in a 4-cycle leaf blower is a simple maintenance job for most homeowners in the United States. Warm the engine, shut it off, drain the old oil, add the correct new oil, and check the level before use. The exact oil grade, fill amount, and drain method vary by model, so the owner’s manual always takes priority.
Fresh oil helps reduce engine wear, control heat, and keep the blower running well. Change the oil outdoors or in a well-ventilated area, keep fuel away from sparks, and recycle the used oil at an approved U.S. collection site.

What You Need Before Changing the Oil
Gather the right oil, tools, and safety gear before you begin. Most oil changes take about 15 to 30 minutes, depending on access to the drain plug.
Supplies
You may need:
- The leaf blower owner’s manual
- The correct engine oil
- A drain pan or shallow container
- A funnel
- A socket or wrench
- Clean rags or paper towels
- Disposable gloves
- A measuring cup or oil bottle with volume marks
- A small oil filter, if the engine uses one
- A sealed container for used oil
Use the oil grade listed in the manual. Common grades include:
- SAE 30 for warm-weather use
- 10W-30 for a wider temperature range
- 5W-30 in some engines used in colder weather
Do not assume that one oil grade fits every 4-cycle leaf blower. Some small engines allow several grades based on outdoor temperature. Others require a specific oil type.
How Much Oil Does a 4-Cycle Leaf Blower Take?
The oil capacity depends on the engine. Small blower engines may use only a few ounces, while larger engines may require more.
| Engine detail | What to do |
|---|---|
| Oil capacity listed in the manual | Use that amount as the maximum reference |
| Dipstick present | Add oil in small amounts and check the level |
| Oil-fill mark or sight window | Stop at the stated mark |
| No clear capacity information | Do not guess; locate the model manual |
| Oil filter replacement required | Add oil gradually after installing the filter |
Oil capacity is not the same as the amount that drains out. Some oil stays inside the engine, and the blower may not be perfectly level during draining. Add oil slowly and use the dipstick or level mark to confirm the final amount.
Before You Start
Move the blower to a flat, stable surface outdoors. Let the engine cool enough to handle safely, but warm it briefly if the manual permits. Warm oil flows more easily and carries suspended dirt out of the engine.
Before draining, confirm these points:
- The engine is a 4-cycle engine.
- The blower has a separate oil-fill point.
- You know the correct oil grade and capacity.
- The fuel tank cap is tight.
- The ignition is off.
- The spark plug wire is disconnected if the manual recommends it for service.
A 2-cycle blower mixes oil with gasoline or uses a premixed fuel. It does not receive an oil change in the same way as a 4-cycle engine.

How to Change Oil in a 4-Cycle Leaf blower
follow this procedure unless your manufacturer gives a different method. The drain plug, fill tube, and dipstick can vary by engine design.
1. Run the Engine Briefly
If the engine is cold, run the blower for about two to three minutes, or follow the warm-up time in the manual. Turn the blower off on a level surface.
Warm oil drains faster than cold oil. Do not leave the blower running while you work near moving parts, hot surfaces, or the open oil-fill area.
2. Shut Off the Blower and Prepare It
Turn off the engine and allow hot parts to cool enough to touch safely. Remove the ignition key, if fitted. Disconnect the spark plug wire when required by the owner’s manual.
Place the drain pan under the oil drain plug or the oil-fill opening. Protect nearby concrete, soil, and plants from spills with cardboard or an absorbent pad.
3. Find the Drain Plug or Drain Route
Look for one of these designs:
- A threaded drain plug at the bottom or side of the crankcase
- A dipstick and fill tube used for tipping the blower
- A drain tube or special oil-drain port
- A removable oil-fill plug with a built-in level mark
Some compact engines do not have a convenient bottom drain plug. The manual may tell you to tilt the machine and drain oil through the fill tube. Follow the stated tipping direction. Tilting the wrong way can send oil into the air filter, muffler, or carburetor.
4. Remove the Oil-Fill Cap
Remove the dipstick or oil-fill cap before opening the drain. This allows air to enter the crankcase and helps the oil flow out.
Wipe dirt from around the cap first. Dirt that falls into the fill opening can enter the engine.
5. Drain the Old Oil
Place the drain pan below the opening. Remove the drain plug with the correct wrench, or tilt the blower as directed by the manual.
Let the oil drain until it slows to an occasional drip. This may take several minutes. Keep the drain plug and its sealing washer clean.
Inspect the old oil as it drains. Dark oil is common and does not automatically mean the engine has failed. However, metal flakes, a strong fuel smell, coolant-like appearance, or a thick creamy color can signal a problem that needs professional attention.
6. Reinstall the Drain Plug
Clean the drain plug and replace the sealing washer if the manual calls for a new one. Thread the plug in by hand first to avoid cross-threading.
Tighten it to the torque listed in the manual. If no torque value is available, tighten it firmly without forcing it. Overtightening can damage the crankcase threads or strip the plug.
Wipe away oil around the drain area.
7. Add the Correct New Oil
Place a funnel in the oil-fill opening. Add the recommended oil in small amounts.
Do not pour the full listed capacity into the engine at once. The stated capacity may assume a completely dry engine, while an oil change leaves a small amount behind.
Pause several times and check the level:
- If the engine has a dipstick, follow the manual for whether it should be screwed in or simply resting on the opening during the check.
- If the engine uses an oil-level mark, keep the blower level.
- If the engine has a sight window, fill only to the specified range.
- Never fill above the upper mark.
Too much oil can cause foaming, smoke, leaks, poor running, or pressure-related damage. Too little oil can increase heat and wear.
8. Check for Leaks
Install the dipstick or oil-fill cap tightly. Wipe the engine clean, then wait a few minutes.
Look at the drain plug, fill area, and nearby seals. If oil appears, shut down the process and correct the leak before starting the engine.
9. Run the Blower and Recheck the Level
Start the blower outdoors and let it run briefly. Stop the engine and wait several minutes for the oil to settle.
Check the oil level again on a flat surface. Add a small amount only if the level is below the correct mark. Do not use the blower if the oil warning light remains on, the engine smokes heavily, or oil leaks from the drain plug.

How to Check the Oil Level Correctly
Check the oil level before each use or at the interval stated in the owner’s manual. A correct level check prevents both overfilling and low-oil operation.
Use this sequence:
- Park the blower on level ground.
- Turn off the engine and let the oil settle.
- Clean the area around the dipstick.
- Remove the dipstick and wipe it clean.
- Reinsert it as the manual directs.
- Remove it again and read the oil level.
- Add oil only when the level is below the safe range.
The oil should reach the lower and upper marks without passing the upper mark. If the oil level rises between checks without adding oil, gasoline may be entering the crankcase. A fuel smell in the oil is a warning sign. Stop using the blower and have the fuel system inspected.
If the oil level drops quickly, inspect for leaks and blue smoke. Oil may be leaking from a drain plug, gasket, seal, or damaged crankcase. Oil can also enter the combustion chamber when an engine has internal wear.

When Should You Change the Oil?
Change the oil at the interval in the owner’s manual. Many small-engine manuals specify a first oil change after an initial break-in period, followed by changes after a set number of operating hours or at least once per season.
The correct interval depends on:
- Engine design
- Hours of use
- Dust and debris
- Outdoor temperature
- Storage conditions
- Whether the engine is new
- The oil type used
A blower used in dry, dusty areas may need more frequent service than one used occasionally on a clean suburban lot. Heavy dust can increase contamination in the oil and air filter.
A practical maintenance schedule is:
| Use pattern | Maintenance approach |
|---|---|
| New engine | Follow the first-change interval in the manual |
| Occasional seasonal use | Change at the manufacturer’s seasonal interval |
| Frequent or commercial use | Track operating hours and follow the severe-use schedule |
| Very dusty work | Inspect oil and air filter more often |
| Long-term storage | Follow the storage instructions, including fuel care |
Do not use oil color alone to decide when service is due. Track the date and operating hours instead.

Common Problems After an Oil Change
Most problems come from the wrong oil level, a loose drain plug, or oil entering a part where it does not belong.
The Blower Smokes After the Oil Change
A small amount of smoke may occur if spilled oil reached the muffler or if the engine was tilted during draining. Stop the engine, let it cool, and clean the outside surfaces.
Continued blue or white smoke may indicate:
- Too much oil
- The wrong tipping direction
- Oil in the air filter
- Oil in the carburetor
- Worn piston rings or valve seals
Check the oil level first. If it is above the upper mark, drain the excess before running the blower again.
The Engine Will Not Start
An oil change should not normally prevent starting. Check:
- The ignition switch
- The spark plug wire
- The fuel level and fuel condition
- The oil level, if the engine has a low-oil shutoff
- Whether oil entered the air filter or spark plug area
Some engines use a low-oil sensor that prevents starting when the oil level is too low. A low-oil sensor does not make overfilling safe.
Oil Leaks From the Drain Plug
A leak usually means the plug is loose, the sealing washer is damaged, the plug is cross-threaded, or the crankcase threads are damaged.
Do not keep tightening the plug with excessive force. Remove it only when the engine is cool, inspect the threads, and install the correct washer or replacement plug.
The Oil Looks Milky or Contains Metal
Milky oil can indicate moisture contamination. Metallic particles can indicate internal wear. A small amount of fine material on a magnetic drain plug may need evaluation, but visible chips or flakes are not normal.
Do not continue operating the blower until the cause is identified.
The Oil Level Is Too High
Drain oil into a clean container until the level reaches the correct mark. Do not rely on smoke alone as proof that the excess has burned away.
Overfilled oil can foam and reduce lubrication. It can also push oil through the breather system and into the air filter.

Safety and Environmental Rules
Used engine oil must be handled as a pollutant. Never pour it onto soil, into a storm drain, or into household trash.
Follow these precautions:
- Change oil outdoors or in good ventilation.
- Keep gasoline, cigarettes, and flames away from the work area.
- Do not work beside a hot muffler or engine.
- Wear gloves and eye protection.
- Keep children and pets away from spilled oil.
- Use a stable drain pan that will not tip.
- Clean spills with absorbent material.
- Store used oil in a closed, labeled container.
- Take used oil to a local recycling center, service shop, or collection program that accepts it.
The U.S. Environmental Protection Agency states that used motor oil can be recycled and re-refined. Local acceptance rules vary, so call before taking oil to a store or recycling site.
If gasoline has mixed with the oil, tell the collection site. Do not combine fuel-contaminated oil with ordinary used oil unless the facility accepts it.

4-Cycle and 2-Cycle Leaf Blowers: Key Difference
A 4-cycle leaf blower stores engine oil in a crankcase. It needs separate oil-level checks and periodic oil changes.
A 2-cycle leaf blower does not use a separate crankcase oil reservoir. Its engine receives lubrication through oil mixed with fuel or supplied by an oil-injection system. Adding crankcase oil to a 2-cycle blower can damage the engine or cause it to malfunction.
Check for these signs of a 4-cycle engine:
- A separate oil-fill cap
- A dipstick
- An oil-level window
- A stated crankcase oil capacity
- Separate fuel and oil instructions in the manual
If the blower has no oil-fill point, do not attempt a conventional oil change. Find the exact model number and confirm the engine type first.

Manufacturer Manual and Evidence Check
The owner’s manual is the controlling source for model-specific instructions. It establishes the correct oil grade, oil capacity, drain method, service interval, tipping direction, and torque specifications.
This guide is based on standard small-engine service practice and the type of information documented in manufacturer maintenance manuals. It does not replace the instructions for a specific blower.
For additional U.S. disposal guidance, consult the Environmental Protection Agency’s used-oil recycling information:
Before servicing, use the model number to locate documentation from the actual manufacturer. Model names can be similar, and engine revisions can change the oil capacity or service procedure.

Frequently Asked Questions
Can I use automotive oil in a 4-cycle leaf blower?
Sometimes. Many small engines allow common automotive oil grades such as SAE 30 or 10W-30, but the correct choice depends on the engine and temperature range. Use the oil specification in the owner’s manual.
Can I change the oil without warming the engine?
Yes, but cold oil drains more slowly and may leave more old oil inside the crankcase. If the manual permits it, run the engine briefly before draining. Never handle a hot engine or muffler without allowing safe cooling time.
What happens if I overfill the leaf blower with oil?
The engine may smoke, run poorly, leak oil, foul the air filter, or develop internal pressure problems. Check the level on flat ground and drain the excess until it reaches the upper mark.
How do I know if my leaf blower is 4-cycle?
Look for a separate oil-fill cap, dipstick, oil sight window, or crankcase oil instructions. If the blower uses an oil-and-gasoline mixture and has no oil-fill point, it is likely a 2-cycle model.
Can I store the blower with old oil in it?
Follow the storage instructions in the manual. In general, fresh oil reduces the contaminants left in the crankcase during storage. Fuel stabilization and fuel-system preparation are separate storage tasks.
Final Checklist
Before using the blower, confirm that:
- The correct oil was used.
- The level is between the marks.
- The drain plug is tight and dry.
- The oil-fill cap or dipstick is installed.
- No oil reached the muffler or air filter.
- The blower starts and runs without heavy smoke.
- Used oil is stored for proper recycling.
The safest next step is to locate the blower’s model number and verify the oil grade, capacity, drain method, and service interval in the manufacturer’s manual.
1 thought on “How To Change Oil In A 4 Cycle Leaf Blower: Quick Guide”