
If your lawn mower is sputtering or failing to start, a dirty carburetor is likely the culprit. This guide walks you through how to use carburetor cleaner to dissolve stubborn gum and varnish deposits, ensuring your machine runs smoothly all season long.
There is nothing more frustrating than stepping into your garage on a sunny Saturday morning, fueled up and ready to tackle the lawn, only to have your mower refuse to start. You pull the cord again and again, but the engine just sputters or stays completely silent. If this sounds like your reality, you are likely dealing with a dirty carburetor. As we head into the 2026 mowing season, it is the perfect time to master the simple art of engine maintenance.
The carburetor acts as the heart of your lawn mower’s engine. It is responsible for mixing the perfect ratio of air and fuel to create the combustion that powers the blades. Over time, gasoline—especially fuel containing ethanol—leaves behind a sticky residue known as varnish. This gunk clogs the tiny ports and jets inside, starving the engine of the fuel it needs. Learning how to use carburetor cleaner on a lawn mower is a rite of passage for every homeowner, and luckily, it is a task you can master in an afternoon.
Key Takeaways
- Safety First: Always work in a well-ventilated area, wear protective eyewear, and disconnect the spark plug before starting any maintenance.
- The Root Cause: Old fuel is the #1 enemy of carburetors; using a stabilizer can prevent gunk buildup in the future.
- Strategic Cleaning: You don’t always need to remove the carburetor; sometimes a simple spray into the intake is enough for minor issues.
- Detailed Maintenance: For deep cleaning, removing the float bowl allows you to target the jet ports where blockages often hide.
- Preventative Care: Consistent maintenance saves you money on expensive replacement parts and professional repair fees.
Understanding Your Carburetor and Fuel System
Before you start spraying, it helps to understand what is happening inside the metal housing of your mower. Think of the carburetor as a tiny kitchen mixer. Its only job is to blend air and fuel. When the mower sits idle during the winter months, the fuel evaporates, leaving behind solid gunk. When you try to start it months later, that blockage prevents the engine from drawing in the fuel it needs to ignite.
Recognizing the Symptoms of a Dirty Carburetor
How do you know it is time to grab the cleaning spray? Your mower will usually give you clear hints. If the engine surges—meaning it speeds up and slows down rhythmically—that is a classic sign of a lean fuel mixture caused by a clog. If it runs for a few seconds and then dies, or if it won’t start at all despite having a fresh spark plug, the carburetor is almost certainly the culprit.
Why Modern Fuel Matters in 2026
In 2026, fuel quality continues to be a major talking point. Most gasoline sold at pumps contains ethanol, which is hygroscopic, meaning it attracts water from the air. This water leads to corrosion inside your aluminum or plastic carburetor body. Using a high-quality fuel stabilizer every time you fill your gas can is the best way to prevent the need for frequent cleaning. However, if the damage is already done, chemical intervention is your best path forward.
Safety Preparations Before You Begin
Before you dive into the engine, we need to talk safety. Carburetor cleaner is a powerful solvent. It is designed to dissolve hardened deposits, which means it can also be harsh on your skin and eyes. Always wear safety goggles to prevent accidental splashback, and consider using nitrile gloves to protect your hands. Work outdoors or in a garage with the door wide open, as the fumes can be overwhelming in tight spaces.
Visual guide about How to Use Carburetor Cleaner Lawn Mower
Image source: rethority.com
Disabling the Power Source
The golden rule of mower maintenance: never work on the engine while it is connected to the power source. Locate the spark plug wire—usually a thick black cable attached to the front or side of the engine—and pull it off. This ensures that even if you accidentally tug the starter cord while moving parts around, the engine cannot fire up and hurt you. It is a simple step that keeps your fingers safe.
Gathering Your Supplies
You don’t need a professional mechanic’s shop to get the job done. For a basic cleaning, you will need a can of quality carburetor cleaner (the kind with the little red straw is best), a set of screwdrivers, a small wrench or socket set, and perhaps a clean rag. Some people also keep a small wire brush or a pipe cleaner handy for scrubbing out particularly stubborn spots if the carburetor is removed entirely.
How to Use Carburetor Cleaner: The Quick Clean Method
You might not always need to take the mower apart. Sometimes, the blockage is minor and located near the intake. This method is the “first line of defense.” It is quick, clean, and often enough to get the mower back to its former glory without requiring complex disassembly.
Spraying the Intake
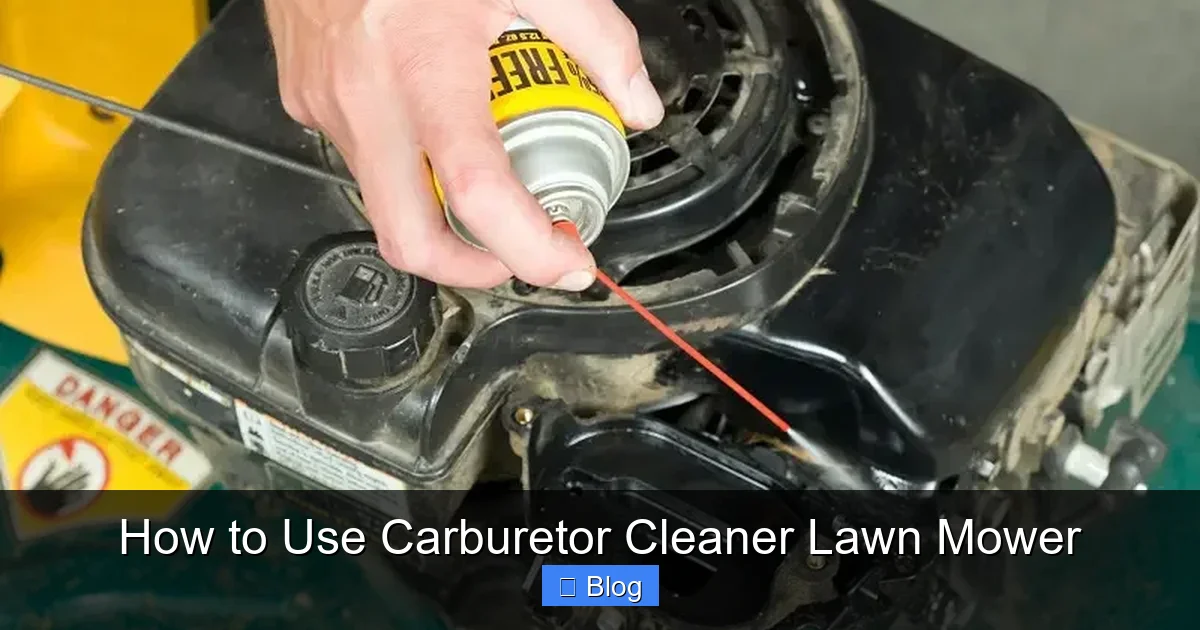
First, remove the air filter housing. You will usually see a wing nut or a few screws holding the cover in place. Once the filter is removed, you will see the throat of the carburetor. Give it a few generous sprays of the cleaner directly into the throat. Wait about five minutes for the solvent to penetrate the hardened varnish. Replace the air filter and try to start the engine. If it runs, you have just saved yourself an hour of work!
Cleansers and Their Role
The solvent works by chemically breaking the bonds of the fuel deposits. When you spray it into the intake, it travels through the butterfly valve and works its way into the jets. If the engine fires but runs a bit roughly at first, don’t worry. That is just the cleaner burning off the gunk. Let it idle for a minute so the chemical can circulate through the entire fuel system.
The Deep Clean: Removing and Disassembling the Carburetor
If the quick spray doesn’t work, the blockage is likely deeper inside the float bowl. This is where most people get nervous, but there is no need to panic. If you take photos of the linkage and where the hoses connect before you start, you will have a map to put everything back together perfectly.
Removing the Float Bowl
The float bowl is the cup-shaped reservoir at the bottom of the carburetor. Locate the bolt holding it in place—it is usually directly underneath. Place a rag or a small container under the carburetor to catch the excess fuel that will spill out. Carefully unscrew the bolt and remove the bowl. You might see some debris or water sitting at the bottom; this is a clear sign that you found the problem area.
Cleaning the Jet Ports
Inside the carburetor, you will find a small tube-like structure called the main jet. This has tiny holes that control the fuel flow. Use your carburetor cleaner to spray through these holes. Use the red straw to get maximum pressure. If you can see the spray coming through the other side, you have successfully cleared the blockage. Wipe everything down with a clean, lint-free cloth and inspect the rubber gasket. If the gasket is cracked or brittle, it is time to replace it to prevent leaks.
Common Pitfalls and How to Avoid Them
Even with the best intentions, things can go wrong. Many people make the mistake of using too much force when tightening the bolts, which can crack the delicate carburetor housing. Remember, these are small engines, not tractor trailers. Everything should be “snug,” not “cranked.”
Handling the Linkages
The small springs and rods attached to the carburetor control the throttle. Be very careful when removing the carburetor so you don’t bend these rods. If you bend them, the mower’s idle will be erratic. If you do happen to pop a spring off, look at the photos you took earlier to see exactly where it attaches. Take your time; there is no prize for finishing the job the fastest.
Dealing with Plastic vs. Metal Components
In 2026, many newer mower models use plastic carburetor bodies. While these are lightweight and resistant to rust, they can be sensitive to aggressive chemicals. Ensure that your carburetor cleaner is labeled as “safe for plastic” or “sensor-safe.” If you are unsure, test it on a small, inconspicuous area of the housing before drenching the entire component in the solvent.
Maintaining Your Mower for the Long Haul
Now that you know how to use carburetor cleaner on a lawn mower, the goal is to ensure you don’t have to do it again for a long time. Prevention is far superior to cleaning. In the fall, when you are done mowing for the year, run the engine until it dies from lack of fuel. This “dry” storage method prevents varnish from forming in the first place.
The Importance of Fresh Fuel
Never leave fuel in your tank for more than three months. If you buy gas in bulk, use a stabilizer. It is inexpensive and widely available. By keeping your fuel fresh, you ensure that the delicate jets inside your carburetor stay clear, allowing you to focus on your landscaping rather than engine repair.
Final Testing
Once everything is reassembled, double-check your connections. Make sure the fuel line is securely attached and there are no leaks. Reconnect your spark plug, fill the tank with fresh, non-ethanol gas if possible, and give the pull cord a steady, firm tug. Your engine should roar to life, sounding smooth and steady. If you have followed these steps, you have successfully mastered basic lawn mower maintenance.
Regularly cleaning your carburetor is a rewarding skill. It connects you to the machine you use to keep your property looking its best. By taking these small steps, you extend the life of your equipment and learn a bit more about how your tools function. Enjoy the satisfaction of a job well done as you head out to reclaim your lawn.
Frequently Asked Questions
How often should I clean my lawn mower carburetor?
You should generally clean it once a year at the start of the season or if you notice symptoms like surging or hard starting. If you use a fuel stabilizer and store the mower properly, you may only need to perform a deep clean every few years.
Can I use brake cleaner instead of carburetor cleaner?
It is not recommended to use brake cleaner, as it may contain chemicals that can damage rubber gaskets and plastic components inside the carburetor. Always stick to products specifically labeled for carburetor and fuel system maintenance.
What if the engine still won’t start after cleaning?
If the carburetor is clean but the engine still won’t run, check the spark plug for fouling or wear and ensure your air filter is not clogged. It could also be a sign of a deeper issue, such as a failing ignition coil or low compression.
Do I need to replace the gaskets when I take the carburetor apart?
It is best practice to replace the gaskets if they appear brittle, cracked, or flat. Gaskets create the air-tight seal necessary for the engine to draw fuel, and reusing damaged ones often leads to leaks or poor performance.
Should I drain the fuel before cleaning?
Yes, it is safer to drain the fuel or let the engine run until the tank is empty before starting your work. This prevents fuel from spilling over your engine or hands while you are handling the carburetor components.
Is it better to replace the carburetor or clean it?
If the carburetor is heavily corroded or the metal housing is damaged, replacement is often the most cost-effective solution. However, for minor clogs and varnish buildup, a thorough cleaning is usually all that is needed to restore peak performance.